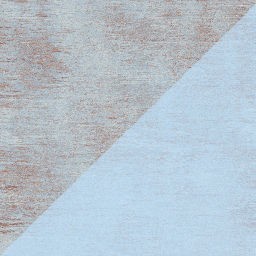
 I wanted to make some changes to the look of the blog and one part of my goal was to add a little more flavor to the background of the sidebar. I was happy with the light blue color so I needed to integrate that color into a seamless texture to use as the background.
My first goal was to find a seamless texture I liked to use as a starting point. After looking through the various Textures Unleashed collections, I decided on Sandblasted Rust from the Textures Unleashed Volume 2: Metal collection. You’ll see it in the top left half of the graphic at right. The final texture I used in the blog sidebar is shown in the bottom right of the graphic at right.
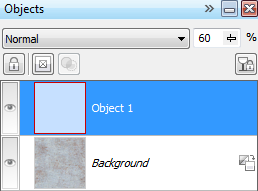 So how did I get from the original texture to the one that I used on the blog? It was actually very simple to do in Corel PHOTO-PAINT. For Photoshop users, the technique is nearly identical. I created a new object (that’s a layer in Photoshop) and filled it with the solid color I have been using in the blog sidebar. You’ll see it as the top object in the screenshot at left.
Once that object was created, I adjusted the Opacity using the slider at the top of the Docker until I had the perfect result. It took all of 2-3 minutes to complete the task. Then it was just a matter of using the newly created texture on the sidebar of the blog. I’m working on a few more subtle changes to the layout that will debut over the next week or two. If any of them lead to a good tip or tutorial, I’ll tell you how it was done.
For those who aren’t familiar with how to use seamless textures, we provide free tutorials on the Textures Unleashed page. Once you know how to use them, you’ll find ways to use them in many of your projects. And if you need to improve your Corel PHOTO-PAINT skills, get a copy of Corel PHOTO-PAINT X5 Unleashed.







0 Comments