Do you wait until a deadline approaches before you learn a basic task in CorelDRAW? Do you quote customers on a job that you’re not sure how to design? There may be a very small percentage of users who can honestly say “no” to both questions. If I go only by the users who contact me, the answers to both are a resounding “yes.”
In this post, I want to go over two stories about award shops where this applied and the very easy solutions to these basic tasks.
Preparing Cursive Text for Cutting
It was late afternoon here in Arizona and I had an early morning flight across the country to speak at an event for awards shops. An e-mail arrived from the shop putting on the event and they were desperate for an easy way to prepare cursive text for output on a cutter. In this case it was going to a CNC router, but the same tips would apply to a laser engraver, vinyl cutter or any other output where just an outline was needed.
The host shop was creating a single piece of wood of each person’s name in cursive, mine is shown in Figure 1. It is around a foot long and about a quarter inch thick. In CorelDRAW, the name was typed with the font Brush Script. I’ll also note that you may want to explore other cursive fonts for these types of projects as Brush Script is severely overused.
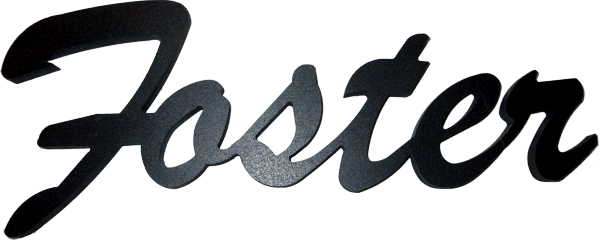
Figure 1: The wood cutout of my name.
When I got the e-mail, the process being used was complex and time consuming. The text was typed, converted to a bitmap and then traced (using Corel PowerTRACE) back to a vector. Each name was taking at least 10-15 minutes. My solution can be done with a single keystroke. So if there were 50 of these to create and you could save at least 10 minutes on each piece, we’re talking about more than eight hours on a very simple project!
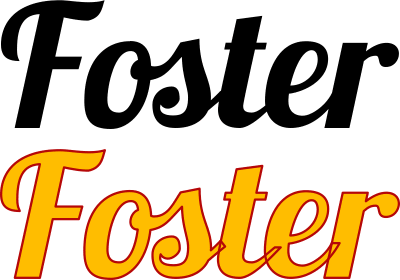 Let’s deconstruct this a bit. In Figure 2, you’ll see my name typed in the Lobster cursive font. While the font is different, the problem is still the same. The top piece of text is in black and you can’t see the hidden problem. Look at the bottom example and you’ll see the outlines of the characters overlap and these overlaps will be cut.
Figure 2: My name typed in a cursive font with top example with black fill and no outline. Bottom example has a yellow fill with a red outline so you can see the problem.
 So how do we fix this so easily? Just select the text and Weld it! Before you do this, make sure it is spelled correctly as it will not be editable after Welding. Select Arrange | Shaping | Weld with just the text selected and you’ll get something like Figure 3. Want to make it even easier? Assign the single key of “W” as the shortcut key to this command and you just press that one key on your keyboard to Weld the text.
Figure 3: The same text after Welding does not have overlaps and is ready to cut.
Now I’m sure someone may notice that my example won’t work as a single piece of wood because the F is not connected. This may require choosing a different font, but similar problems could occur if the dot on an “I” is not connected. You’ll have to decide if you leave that piece out or you’ll need to draw a small connector shape and Weld it to the text so it is all a single object.
Batch Processing Hundreds of Name Badges
Creating a single award for a customer may not be the most profitable project unless the award has a high price. But if you can find a way to create hundreds or even thousands of a similar piece efficiently, the small profit on each piece can end up being a nice boost to your cash register. A perfect example of this is name badges, though I want you to consider other types of projects where the design is the same and only the name changes (or some other variable).
Most people have used a mail merge function in a word processor and CorelDRAW has the same basic functionality in its Print Merge function. In the example of name badges, you have a database of names (and maybe other info on each person) and you merge the database with a single piece of artwork.
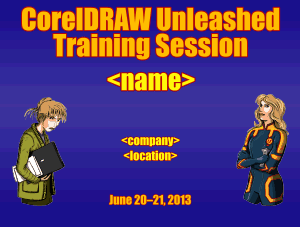 Figure 4 shows a single name badge containing three merge fields. Maybe your project will have a single merge field and maybe it has twenty. The process is exactly the same. For those of you doing laser engraving, there is absolutely no difference in your workflow except that your file will be in black and white or grayscale. If you want the badges to be automatically cut by the laser, add a cutline at the border of the badge using the cut color needed by your laser.
Figure 4: A sample name badge ready for merging.
Now I know some of you will rattle off a long list of reasons for not upgrading your version of CorelDRAW. There was one feature added in CorelDRAW X4 (also in X5 and X6) that justifies the upgrade if you use Print Merge. What is it? You can merge the data into a new CorelDRAW file. The older versions require you to merge directly to your output device.
Why is this such a big deal? I bet you’ve run into situations where a name was so long it messed up a merge before, haven’t you? By merging the data to a new file, you can quickly go through the pages and correct any problems. Even better, you can then print that file using the imposition features in CorelDRAW. Figure 5 shows the print preview for four name badges. They are positioned perfectly for pre-perforated name badge paper.
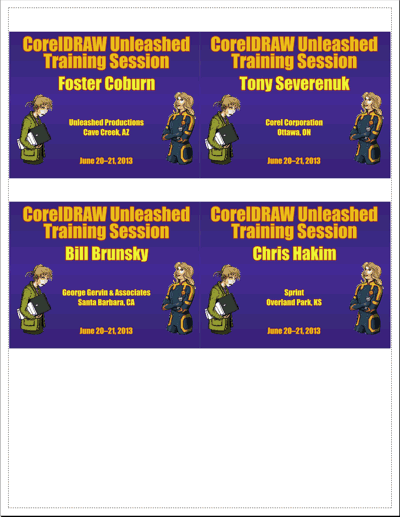
Figure 5: Print Preview of name badges positioned in exact positions.
CorelDRAW’s imposition feature allows you to determine the number of rows and columns as well as the spacing between them. Yes laser engravers, you can set this up for the bed size of your laser. So I hope you can see that merging from a database allows you to create a large number of pieces quickly and the imposition feature allows you to maximize the output on your material. Together they provide a great way for you to make money!
In Closing
I specifically picked two tasks that every awards shop should be able to accomplish in their sleep and I hope you can see that knowing these tasks can really help your bottom line. There are certainly other examples and you need to make sure you have an excellent grasp of CorelDRAW so you can take advantage of projects that are going to make you money!







Thank you so much! The tip about welding cursive letters saved me…trying to manually manipulate the vectorized text was exhausting and unproductive.
In Figure 2, regarding welding a name to export for cutting, the letters “o” and “s” have a common outline as if they are already welded, so I’m guessing you want to weld the entire name regardless of appearances just to be on the safe side (especially if you’re using black text and cannot see what will or will not be combined)?
The “os” string in this particular font is a ligature and thus the reason the characters are already joined correctly. If the desire is to cut, the entire cursive word needs to be welded. Otherwise you get undesirable cuts.