The local weather was spectacular a couple of weeks ago and I wanted to take a day off to have some fun. So I planned a day of scuba diving that Friday to end the week on a high note. The diving went well, but the day before was the beginning of some tech disasters. So let’s roll the clock back to that fateful Thursday and I’ll go through the disasters that started that day and how they were resolved. Hopefully you won’t need to take advantage of the solutions I present, though you should be prepared in case they happen.
Failed Windows Update
Windows Updates can cause problems. For that reason I have “automatic” updates disabled so that I can choose when to download and install them. If you aren’t sure how to disable them in Windows 10, please read How To Disable Automatic Updates in Windows 10.
There I was on that fateful Thursday. I knew there were some Windows Updates that needed to be installed and it was a convenient time for me. So I went ahead and pushed the button to download and install them. Unfortunately the process got hung up on one of the updates and it wouldn’t complete. I waited and waited and it became clear it wasn’t going to complete. There was no option left but to restart the computer.
When the computer attempted to start, I just got a spinning logo. It never got to Windows at all. Ugh, I hate it when that happens. Luckily I was prepared. Are you prepared for a situation like that?
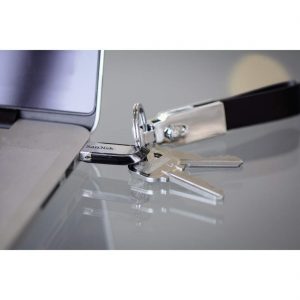 One piece of hardware is required and one piece of software. First, you’ll need a USB thumb drive with a minimum of 16 GB of space. These are really inexpensive. One such drive is the SanDisk Ultra Flair 16GB USB 3.0 Flash Drive and it is well under $10 as I write this. Now, you’ll need to create a “recovery drive”. Microsoft has a Create a recovery drive tutorial with step-by-step instructions.
Should you have a situation like mine, you can use that recovery drive to bring Windows back to life from a variety of situations. Again, Microsoft has a tutorial Recovery options in Windows 10 covering the various options. I chose to go back to a system restore point and it worked perfectly. Then I downloaded and installed the updates again. Yes, I lost some time in the process. But it would have been far worse if I hadn’t had the recovery drive sitting on my desk.
Do you have a Windows Recovery Drive available? If you don’t, I would highly recommend it. It is a small insurance policy should something go wrong!
Down Goes the Internet
Once I got the computer working again on that Thursday, I got caught up on all projects so that I could dive on Friday. It was a beautiful day on and under the water. But a storm was coming and it hit late Saturday night. While I live steps from the sea, it is a desert here and rain is infrequent. It started raining late Saturday night and kept going off and on for several days. When I awoke on Monday morning, I had no Internet service. Even worse, Monday was a holiday here so nothing would get fixed.
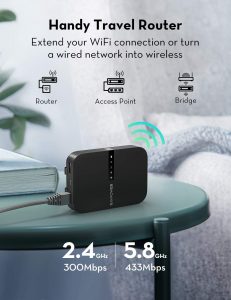 I checked around with several neighbors and their service was working so it seemed like an issue specific to my connection. Since I knew it wasn’t going to be fixed quickly, I had to find an alternative solution to get connected. Luckily my nearest neighbor is an engineer from one of the biggest names in tech. I used a couple of different tools to “borrow” his connection. Both of these are tools I’ve written about in posts this year. First was a range extender that I covered in TP-Link WiFi Range Extender Brings Stronger Signals at Longer Distances.
While the range extender worked, it wasn’t the best solution for me. Instead I used my travel router to bring his signal to my house. I wrote about it in RavPower FileHub Makes Geek Travel Easier. The situation wasn’t ideal, but at least I could get an Internet signal until my own connection was repaired.
It turned out the cable coming into my house was damaged. Once it was repaired, I was connected again. But three days with none or limited Internet made me a little crazy. Thankfully the travel router made it a little easier to digest.
If you lose your connection, do you have the tools you need to limp along until it can be restored?
Down Goes the Hard Drive
It was now six days from the start of the disaster and all seemed well again. The Internet connection was back and I rebooted my computer. A dire warning appeared telling me that the SMART warning on my primary data drive indicated imminent failure. Oh no, all my data is gonna go poof! Two hours later, the drive bit the dust and all data on it was lost. When I shared this story with a couple of friends, I remained calm because I knew my data was safe!
 Why was I so confident my data was safe? Because I have active backup plans in place! Each night I use GoodSync to backup my data drive to my NAS drive. This meant that at worst I had lost a few hours of data since the last backup. That was further limited because it was hard for me to create data with the limited Internet connection.
Note: GoodSync has a Black Friday / Cyber Monday sale active as I type this. It will end on December 2, 2019. Use the coupon code GSB35 to save 35%.
Time to make a repair checklist. I’d need to remove the failed drive from the computer and I’d need a new drive to take it’s place. Removing a drive is no problem, I’ve got screwdrivers for that. While it may sound odd, I also had eight spare hard drives just laying around. Loyal readers may remember when the NAS drive crashed a little over a year ago. I wrote about it in When Your Backup Plan Fails, You Pay Dearly for Recovery. As part of the recovery, I chose to buy 10 all-new 4 TB drives to replace the 8 good (and 2 bad) 2 TB drives that were installed. It wasn’t the least expensive solution, but it gave me far more storage space going forward. Plus I had 8 spare 2 TB drives! Perfect since the newly deceased drive was 1.5 TB.
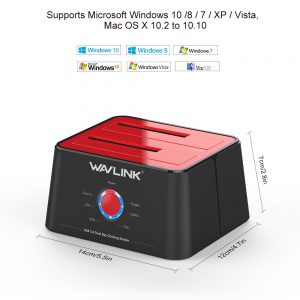 Now I have the two drives in hand and it is time to try the first method of recovery. A few months ago I wrote WAVLINK USB 3.0 to SATA Docking Station about a device I have sitting on my desk. It will clone one drive to another. Both drives were inserted into the device and I attempted the clone. I wasn’t surprised it didn’t work since the old drive was truly dead. But it was worth a try.
When that didn’t work, I installed the new 2 TB drive and booted the computer. Windows formatted the drive and now it was time to restore the data. When there are over 1 TB of files, it can be a slow process. While I didn’t time it, I think it took around nine hours. As expected, all data was back and I’m up and running again. Darned right I backed it up again overnight just in case.
Do you have a backup plan to protect your data? I don’t expect everyone to have a stash of extra hard drives, but you should do whatever it takes to protect your data from a drive failure. It will happen to you!
Given the various computer issues I’ve had in the last 15 months, I sure hope that the disasters are behind me for a very long time.
Photo by Aubrey Rose Odom







0 Comments