 Today is a huge day for graphic designers. Many of them worked hard to design greeting cards that will be given to loved ones on Valentine’s Day. In honor of the day, I wanted to show you a cool tip for creating hearts of all shapes and sizes in CorelDRAW.
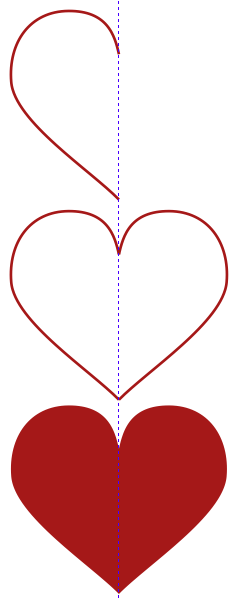
We’ll start by putting a vertical guideline on our page and turning on Snap to Guidelines. Using the Bézier tool, draw a curve representing the left half of the heart you want. The only thing that is important is to have the two end points of the shape snap to the guideline as shown at top right.
Once you have completed the half hearted shape, you’ll want to select Edit | Clone to create another half that is linked. Flip the new half and move it into place on the right side of the guideline as shown at middle right. Yes, there really are two pieces there that kiss in the middle. If you feel the shape needs a little more love, do some node editing on the left hand side and you’ll see the right hand side changes symmetrically.
When you have the shape that gets your heart racing, select the two pieces and select Arrange | Combine. At the very bottom of the heart will be two nodes sitting on the guideline that are not closed. Marquee-select them and join the nodes. Repeat this for the two upper nodes sitting on the guideline. Now you can fill the shape with whatever fill you want as I have done at bottom right.
The real key here is the Clone feature that allows the two sides to move symmetrically as you edit the shape.
Want to get my heart pounding? I would love it if you would treat yourself to a copy of CorelDRAW X6 Unleashed and all the tips it contains. Maybe you want a new way to fill your heart (and your toolbox), have you considered one of the thousands of awesome fills available at Textures Unleashed? The more collections you get, the more love I’ll feel! Please don’t break my heart.


0 Comments